Intro
The brief of this unit is to understand the pipelines and asset development (modelling, rigging and retopology). Its focus on building independent problem solving skills, which will help me on my final major project in third year and for future use in the industry.
Here are a few roles that I could choose for my research and development.
Here are a few roles that I could choose for my research and development.
Declaration of chosen role
For my research and development, I will be researching into character rigging. I have chosen rigging because I would like to become a professional rigger. I want to challenge myself to learn new things and come out of my comfort zone. I already know how to do some of the roles that I was given on the list above. This will be a great opportunity to learn.
I will be mainly focused on facial rigging. I will be rigging a human face learning the techniques and the skills. The face I will be using is a model I created about 2 years ago. I am using this model because it has good topology. I will look at different methods of rigging. Learning where to use set driven keys, blend shapes, joints, control curves, constraint, deformers, weight painting, IK (Inverse Kinematics) and FK (Forward Kinematics) handles in suitable places.
At the end of this research and development I would like to become an efficient rigger where I can use the kills that I have learnt into other characters.
Timeline
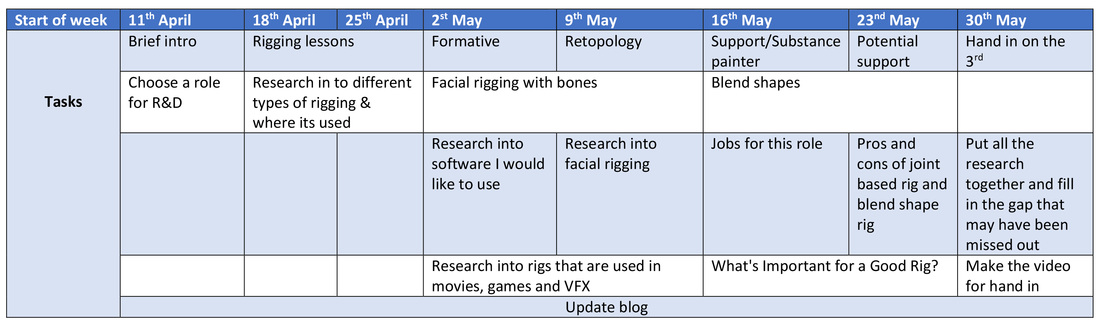
Here is a line like that I created for myself, to keep things organized.
Rigging software
Here are a few rigging softwares but I will be focusing on just Autodesk Maya. I am using Maya because it's used all over the industry compared to others.

|

|

|

|
Rigging Lessons
|
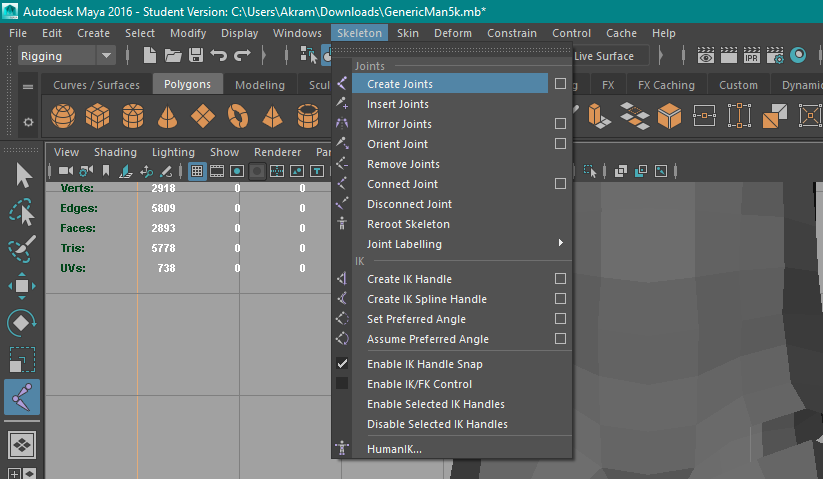
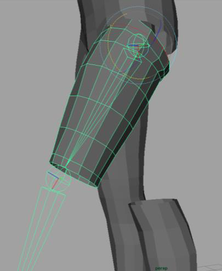
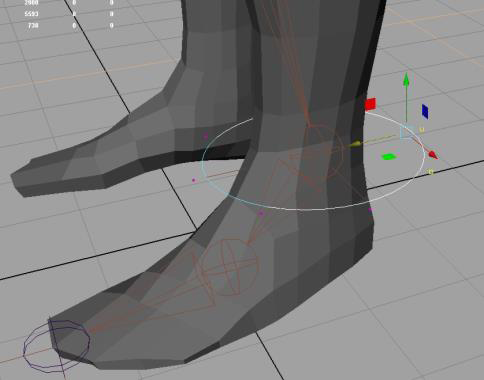
First lesson we learnt how to create joints and creating IK handle. Then creating EP curve to add handle to the rig which allows the animator to animate the character.
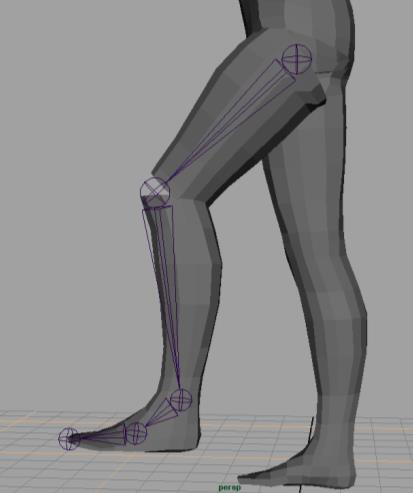
We started with the leg first, adding joints. I added jointed by going to Skeleton > create joints and click on the where I want my joints and then pressing enter.
|
|
|
|
After creating the joints, I have parents the thigh mesh to the rig. I did that by selecting the mesh and the top of the rig and pressing Ctrl + P. This allow me to test the rig and see if it’s working. Since it was working I have also adding the low part of the mesh to the rig and tested that part out too.
|
|
|
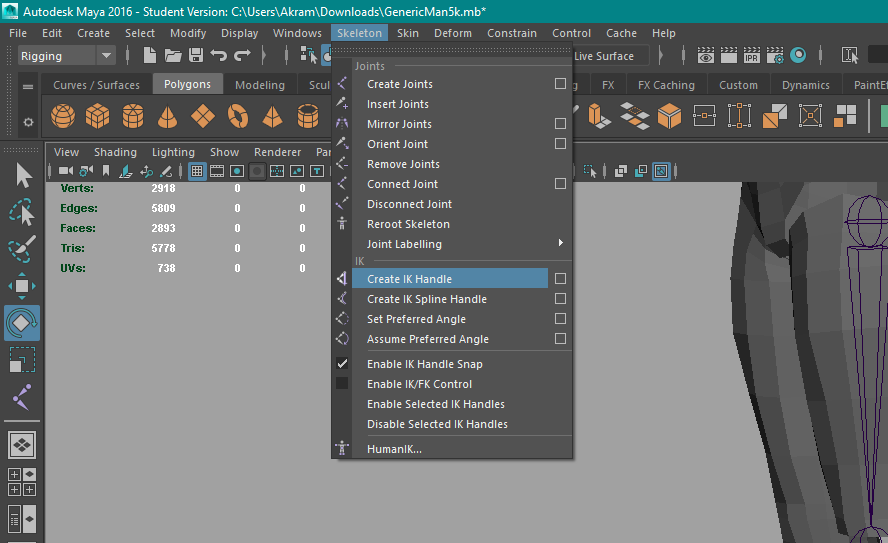
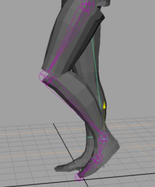
To create a IK handle I went to Skeleton > create IK Handle. After I had to select the top of the rig and then press on the ankle of the rig. Which created a IK handle for the rig. Now I can select the IK handle and move it and the whole leg will move.
|
|
|
Character rigging in Naughty dog's from The Last of Us - Research
|
|
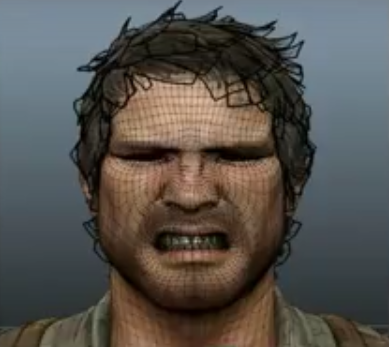
Here I have wrote down few notes after watching Character rigging in Naughty dog's from The Last of Us.
Character Considerations
|
|
Rigging Eyes and mouth
|
|
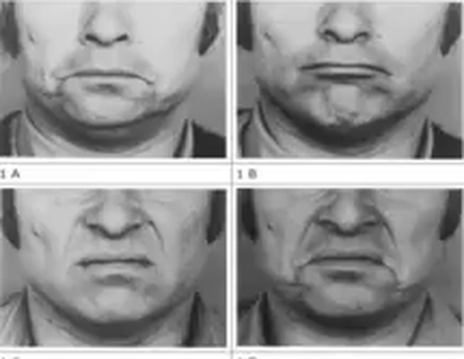
FACs
|
|
High mesh density
|

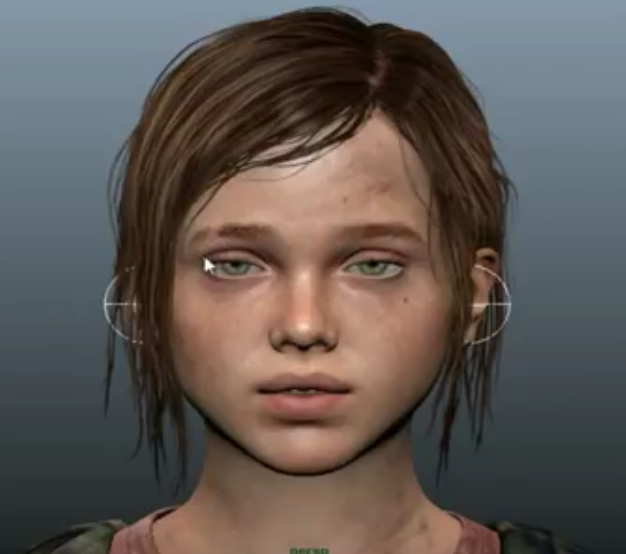
Pupil dilation
Allows you to a feel of realism. You can show fear or happiness though eyes

Blend-shapes correctives
- Use Mudbox to sculpt blend-shape correctives
- Joints had fidelity
- Volumes were particularly difficult to shapes with joins
- Added some complexity to the pipeline
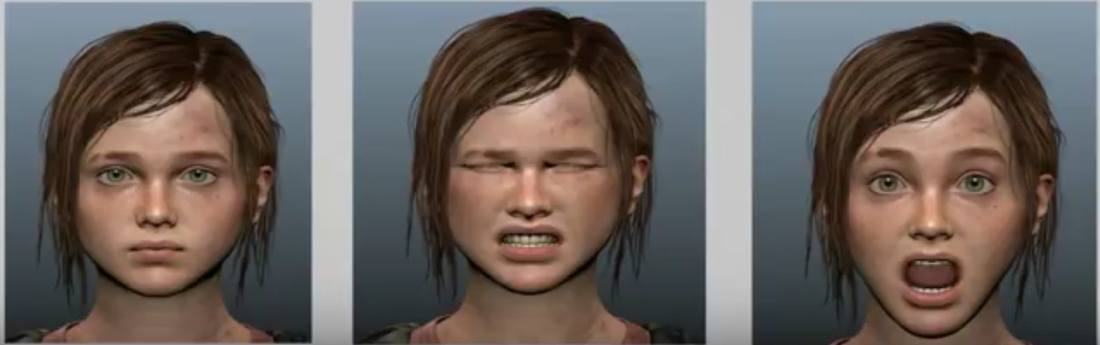
Extremes
- Pushing the extremes.
- Rankle maps helps
- Pushing the extremes and keep it to the character so the character don’t change it stays the same character. Doesn't end up looking like a whole different character.
- Making the movement organic when animating. Moving everything together to make feel like an organic piece
- For the face the challenge was getting better understanding of things and pushing thing artistically
Creating Stretchy joints
To give your character cartoon feel to it and if you want to add exaggeration to the pose you can create stretchy limbs. Which allows you to stretch your limbs when animating. Rigging for stretch requires a little bit of math. Maya doesn't normally build that into rigs, so I have to build it in myself.
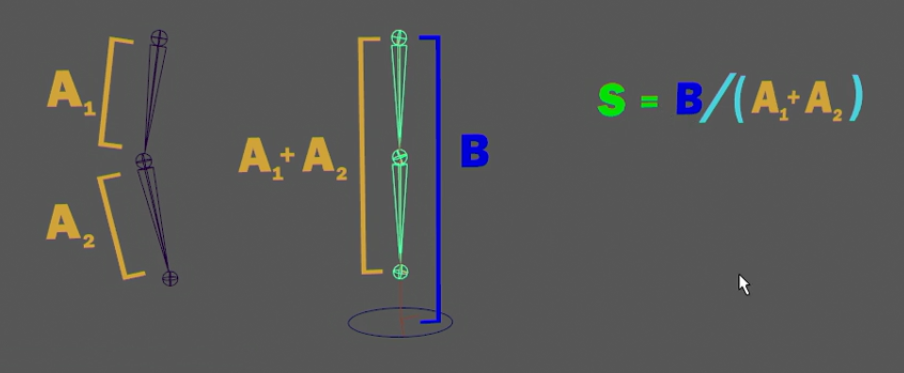
This what I started to look at before the formative. But changed and now looking at facial rigging.
To create the stretchy joints you have to measure the length of the joints. S = B / ( A1+A2+). Stretch = length of the IK handle / (length of the joint 1 + length of the joint 1). When this value B is greater than the sum of the joints, we have a number greater than one.
If B is smaller than A, we don't want those joints to shrink down because in this point, B is smaller than the sum of the joints and so this number will be smaller than one.
$REF_Length = Leg_Ref_DistShape1.distance + Leg_Ref_DistShape2.distance;
$IK_Length = L_Leg_IK_DistShape.distance;
if ($IK_Length > $REF_Length ) {
L_Leg_IK01.scaleX = $IK_Length/$REF_Length ;
}
else {
L_Leg_IK01.scaleX = 1;
}
Rigging Guideline for the Artist: What's Important for a Good Rig?

|
Stefan Ehrenhaus is creator rigging article, that I used to help me understand basic of rigging. He started his 3D journey more then three years in the past as a passion, finding out from books and movies in his spare time. After discovering Digital-Tutors he started to focus more on 3D and speedily realized that this was beginning to grow to be more than only a temporary interest. He took the time to gain knowledge of every step inside the 3D pipeline.
|
Here are a few thing that you need for a good rig Planning the Action, A Good Model, Good Joints, Control System and Rig Hierarchy, The Difference Between Game and Film, Volume, Preservation, A Scripted Rig Approach, Good Skinning and Muscle Systems.
Reference
http://blog.digitaltutors.com/rigging-guideline-artist-whats-important-good-rig/
Reference
http://blog.digitaltutors.com/rigging-guideline-artist-whats-important-good-rig/
Career as a rigger
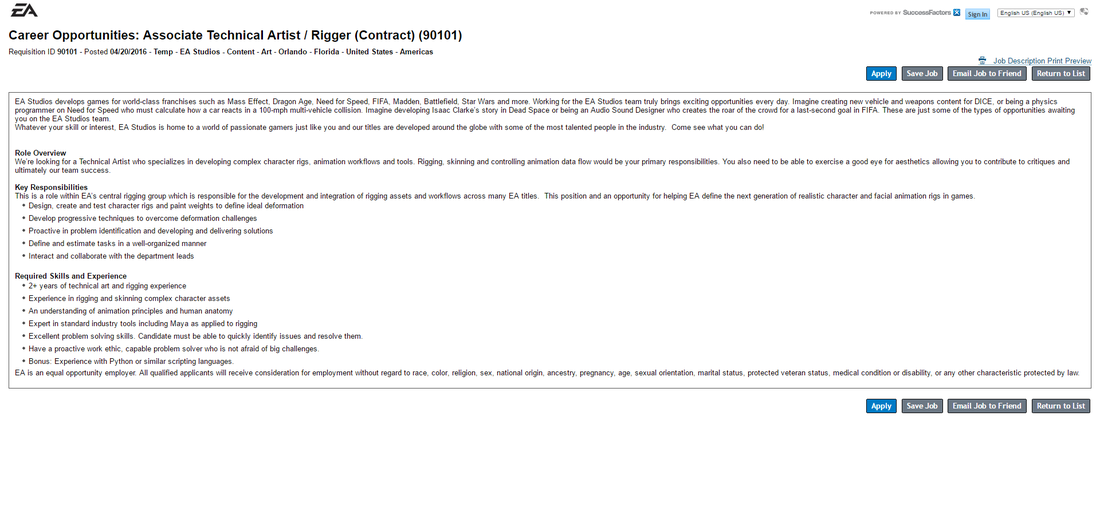
To become a rigger for EA games you must have these skills:
|
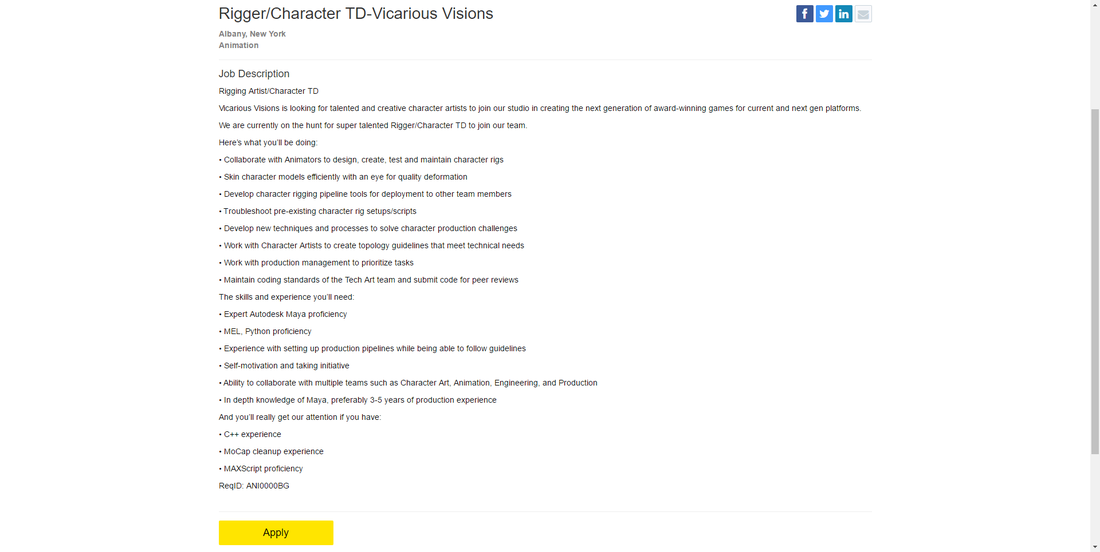
Here are what you will need to have to become a rigger for Activision:
• Expert Autodesk Maya proficiency • MEL, Python proficiency • Experience with setting up production pipelines while being able to follow guidelines • Self-motivation and taking initiative • Ability to collaborate with multiple teams such as Character Art, Animation, Engineering, and Production • In depth knowledge of Maya, preferably 3-5 years of production experience |
Facial Animation Techniques
Joint based vs Blend shapes? Here I have listed pros and cons of joint based facial rig vs blendshape facial rig. It's by Lanz Singbeil.
Blend Shapes:
Pros:
Joint Based:
Pros:
Reference
http://www.sfu.ca/~lws2/p/images/files%20and%20resources/IAT%20445%20-%20Lab%209.pdf
Blend Shapes:
Pros:
- Blend shapes are more precise because you can specify the exact locations of vertices for each expression on the face mesh. But whereas using joints means you have less control over the vertices and the movement is less precise. This mean blends shapes will allow the animator to have more control over the animation, and joints can limit the animator.
- It is fast to start setting up different expressions.
- Easy-to-use sliders to key the different expressions. This allows to have a blend between the original mesh and final vertices position. But whereas with joints you will have to create your own sliders if you want with set driven keys.
- It requires duplicate versions of the same model. Which will be messy, hard to deal with and this will also increase the file size.
- You cannot easily control deformations of multiple meshes simultaneously.
- Does not play well with file referencing.
- Is not supported in Unity and other game engines but they do support joint rigs.
Joint Based:
Pros:
- Can control multiple meshes simultaneously (such as hair and facial hair)
- Works off of the base model so everything is centralized. This means it plays better with file referencing.
- Animations done using joints can be baked and exported for Unity and other games engines.
- Can be more challenging to set up
- Less direct control of individual vertices. A poor rig will give you only limited expressions.
- A good rig requires the creation of your own handles and sliders
Reference
http://www.sfu.ca/~lws2/p/images/files%20and%20resources/IAT%20445%20-%20Lab%209.pdf
Facial rig - Research
Joint based vs Blend shapes?
Blend Shapes:
Pros:
Joint Based:
Pros:
Blend Shapes:
Pros:
- Blend shapes are extra distinctive due to the fact that you would be able to specify the detailed areas of vertices for each and every expression on the face mesh. But whereas using joints means you could have less control over the vertices and the movement is much less exact. This mean blends shapes will allow the animator to have more control over the animation, and joints can limit the animator.
- It is fast to start setting up different expressions.
- Easy-to-use sliders to key the different expressions. This allows to have a blend between the original mesh and final vertices position. But whereas with joints you will have to create your own sliders if you want with set driven keys.
- It requires duplicate versions of the same model. Which will be messy, hard to deal with and this will also increase the file size.
- You cannot easily control deformations of multiple meshes simultaneously.
- Does not play well with file referencing.
- Is not supported in Unity and other game engines but they do support joint rigs.
Joint Based:
Pros:
- Can control multiple meshes simultaneously (such as hair and facial hair)
- Works off of the base model so everything is centralized. This means it plays better with file referencing.
- Animations done using joints can be baked and exported for Unity and other games engines.
- Can be more challenging to set up
- Less direct control of individual vertices. A poor rig will give you only limited expressions.
- A good rig requires the creation of your own handles and sliders
Rigging for Games Films and VFX
From reading Character Rigging, Deformations, and Simulations in Film and Game Production pdf file I found online. This is what I have found that relates to my chosen role.
VFX
Games
Films
VFX
- There are various special rigs are wanted for VFX. The rig will be used against live action shot there for it is going to desire an excessive degree of detailed within the rig.
- For each and every type of rig there maybe a group of artists that use the rigs, like Motion capture rig, motion tracking rig, performance rig, simulation rig, deformation rig, facial rig, muscle rig and clothing rig.
- Many joints are wanted however additionally it is not required to have a joint for every bone in the character body. For motion capture the joints will also be calibrated to the actors proportions, nevertheless where less joints needed for motion is better.
Games
- There are restrictions and obstacles because of the character will be rendered in real-time.
- Extra skinned polygons and joints there are within the rig implies that it will take longer to render and so when rigging you must balance the quantity of joints within the skeleton with the freedom for the model to maneuver without affecting the frame rate. In addition, vertices must have a limit on the quantity of joints they can be littered with.
- When rigging, you must have balance the quality and complexity of the rig with how it will have an effect on the run time efficiency.
- There are boundaries additionally established on the hardware/platform the animation will be used on.
Films
- The rig needs to allow the animators to have a number of freedom because of how the models have to deform for movement as well as a result of the amount of animation needed for a realistic movie.
- The animation used in these films just isn't normally physically correct and so there wishes to be a robust relationship between the character design and rigging so the character can move in the best way it is required.
- There's extra awareness to detail. Rendering slowly enables for more joints within the rig, which allows the animators to animate the characters detailed motions
Reference:
http://webstaff.itn.liu.se/~perla/Siggraph2011/content/courses/mclaughlin.pdf
http://webstaff.itn.liu.se/~perla/Siggraph2011/content/courses/mclaughlin.pdf
Rigging face with joint
|
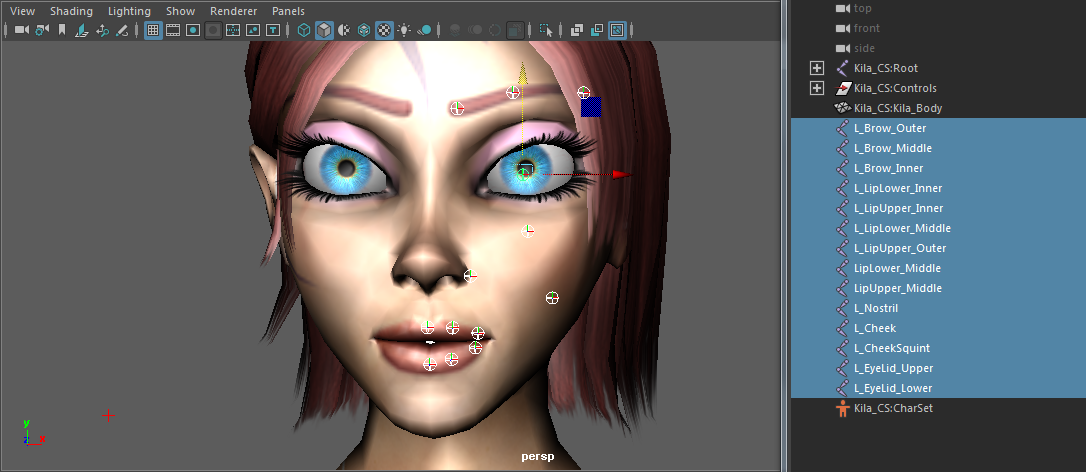
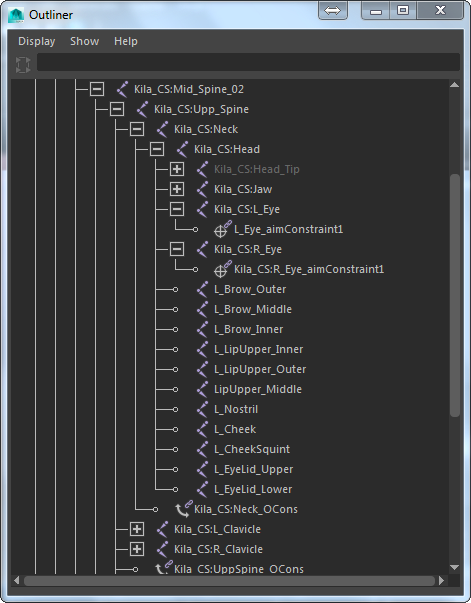
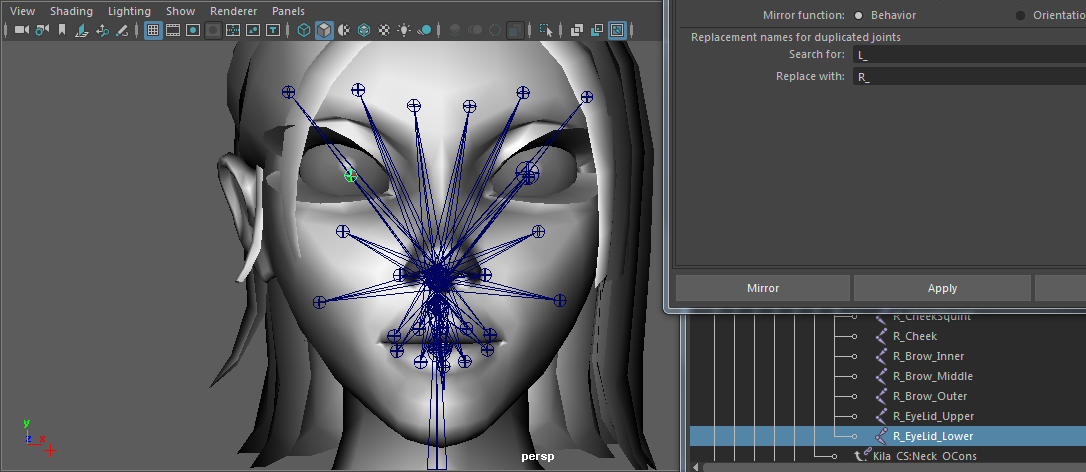
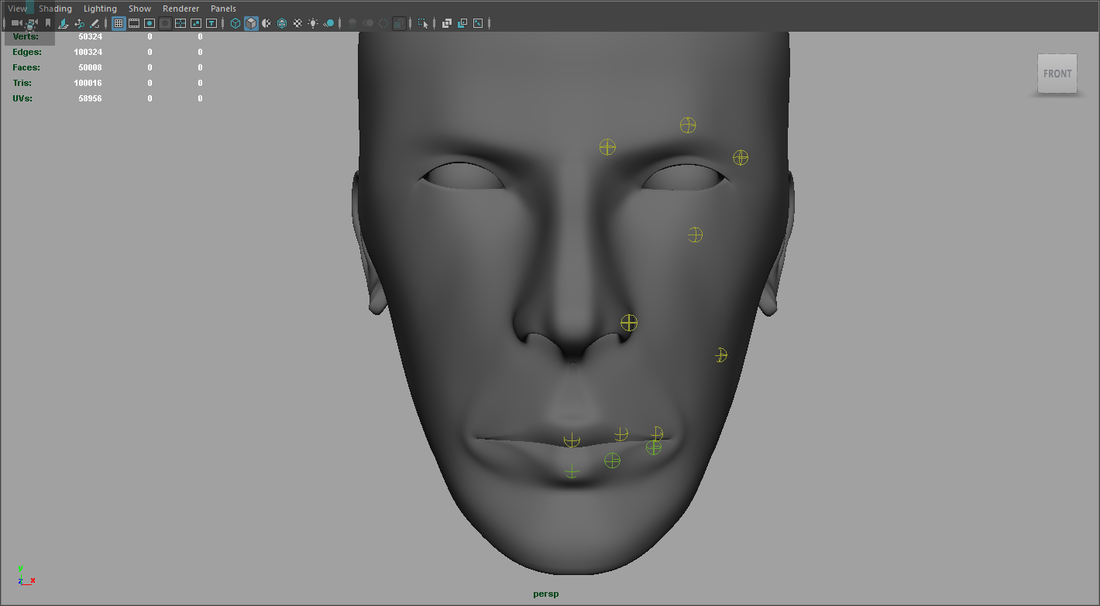
I found this excellent rig with a little tutorial of facial rigging with joints. I started of by just adding individual joints to the key parts of the face like the eyebrow, eyelid, cheek, nostril and the lips.
After creating the joints I have parented it to the head joint. Now the joints I created will move with her body. I parented them by select all the joints, except for the ones forming the lower lips. Then holding Shift, add the Head joint to the selection. And then pressing P to parent these joints to the Head joint.
After I selected the lower lip joints and Hold Shift to add the Jaw joint to the selection. And again, press P to parent the lips to the jaw. |
|
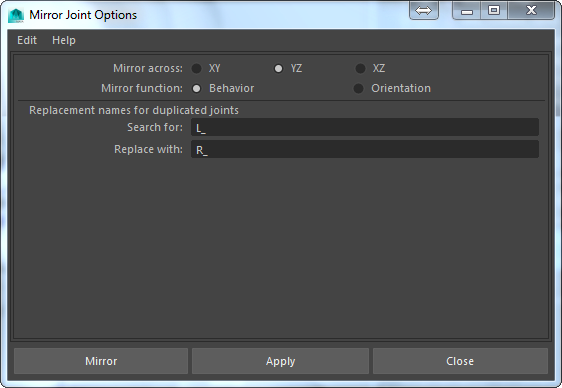
To mirror my joint I had to select the joints then, Skeleton > Mirror Joint and opening the option box. Setting Mirror Across to YZ. Setting Mirror Function to Behavior.
Under Replacement Names for Duplicate Joint set Search For to “L_”, and Replace With to “R_”. This automatically renamed the joints that I have mirrored. |
|
I had also skinned my the joint to the mesh.
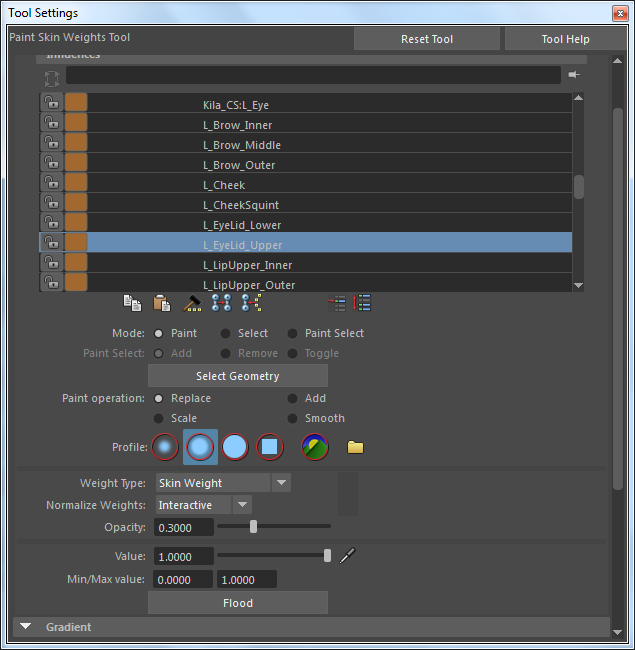
To fix my joints I have to go in and edit them one by one. This has enabled me to control what part of my skin is affected. I did this by going to Skeleton > paint weight. And then selected the joint and painted weight to it. 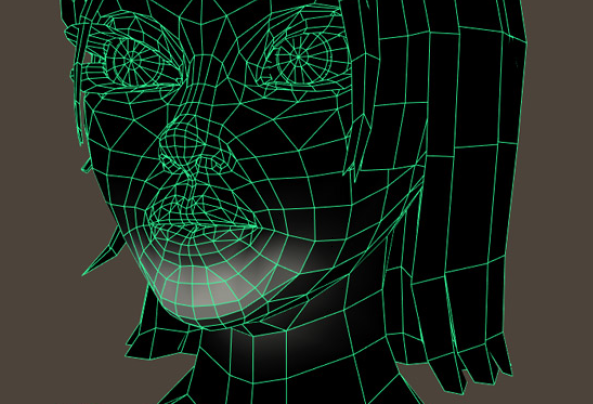
|
|
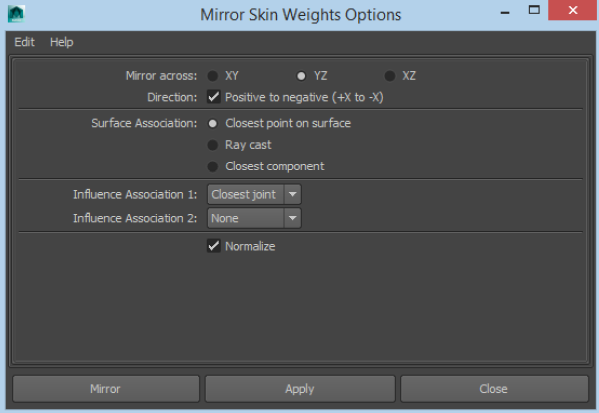
After painting weight I have also Mirrored the skin weights to the other side. I this done same way as I mirrored the joints over. This has saved me a lot of time.
|
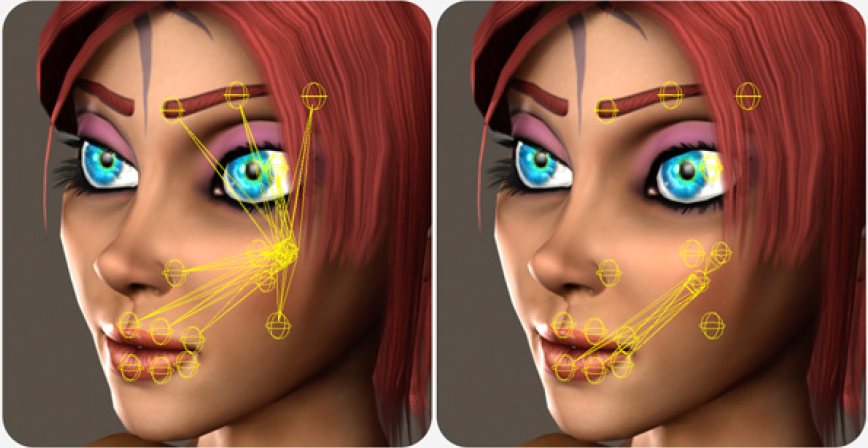
Rigging a face that I modelled
I have rigged a face that I modelled about two years ago. I choose this model because it has good topology. I went through as the similar process as above but putting my twist to it.
Blendshape
Here is a video of me creating a blendshape rig. Here are few steps that I went through.
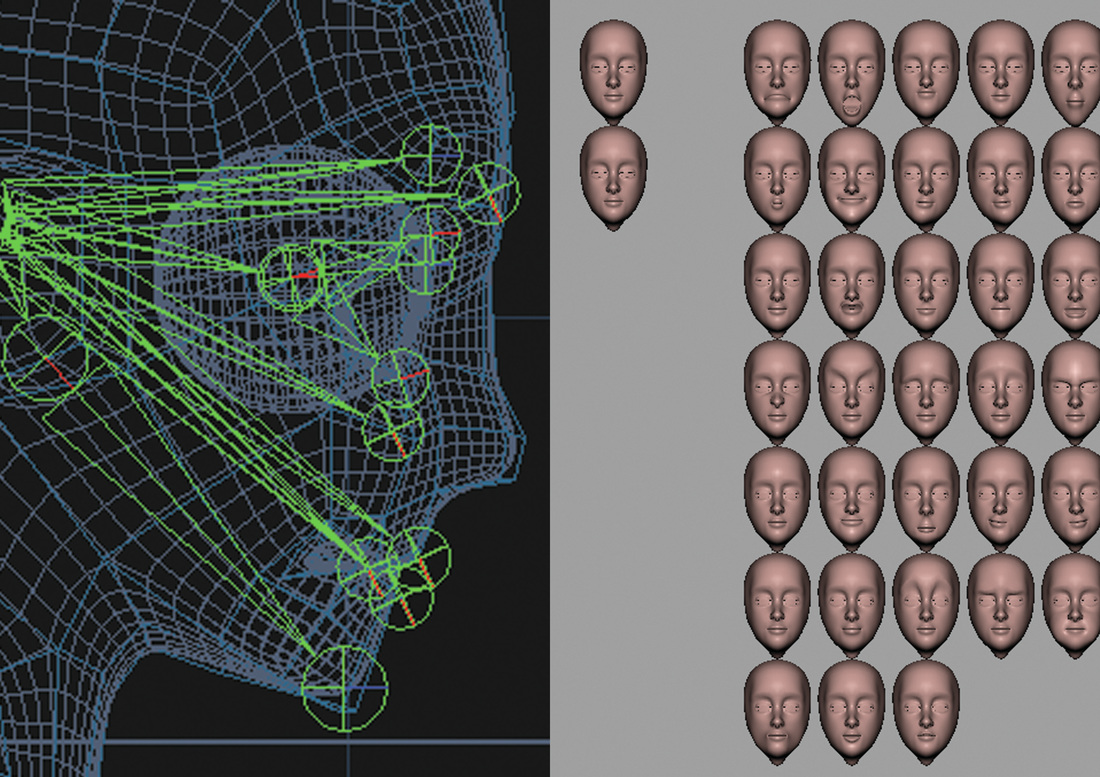
Step 1: Model Preparation
Step 2: Morph Targets
Step 3: Building morph library
Step 4: Set key driven
Conclusion
With blendshape you might have far more flexibility, and may also be extra specified about how the ultimate face shapes appear. This may also be useful in case you are constrained on the quantity of joints you might be allowed to use, however on the flip side the file dimension will start to upward thrust with each new form you add. This implies more data to export and be handled through the processor. Another down side to blendshapes is that if the main model changes, the targets will all need to be recreated.
